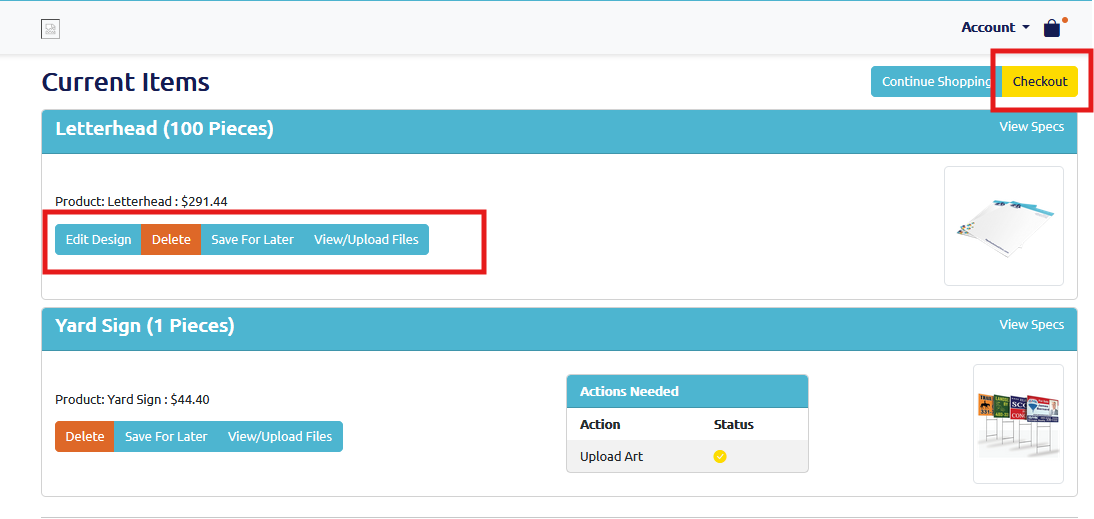
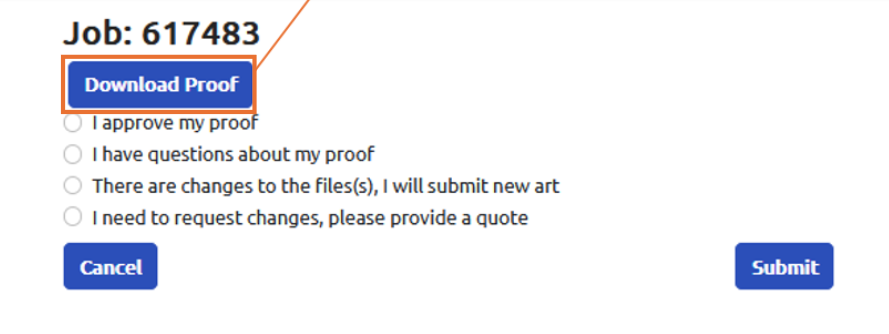
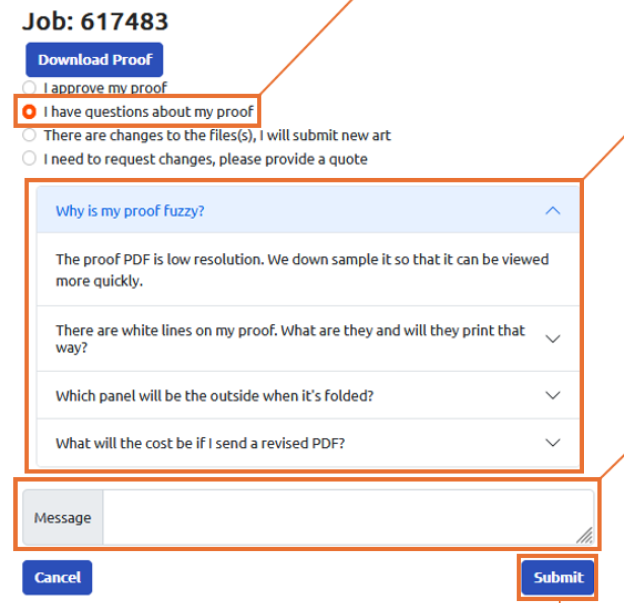
Frequently Asked Questions
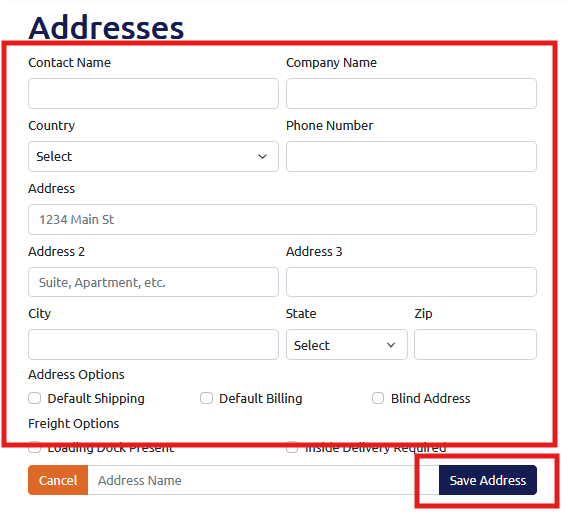
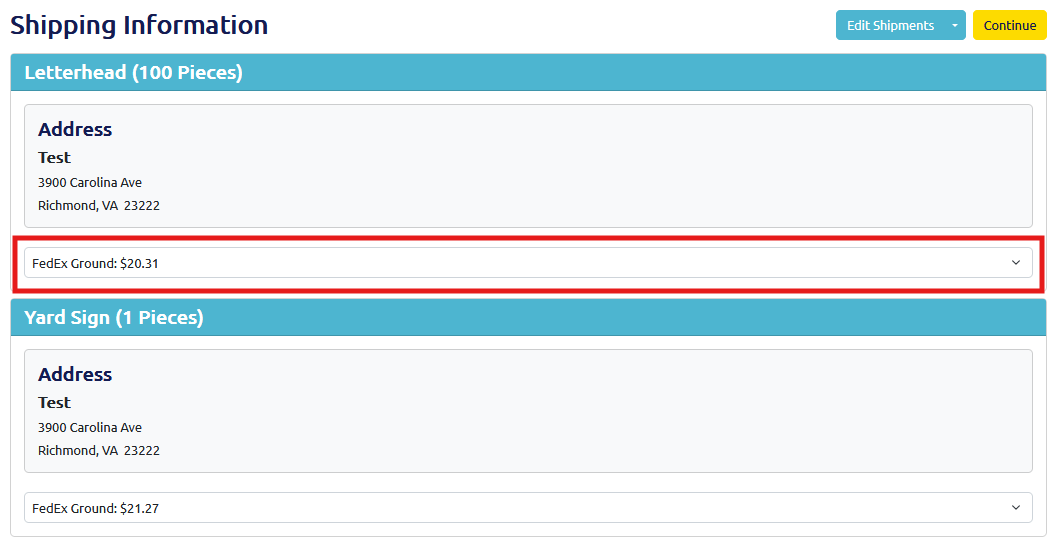
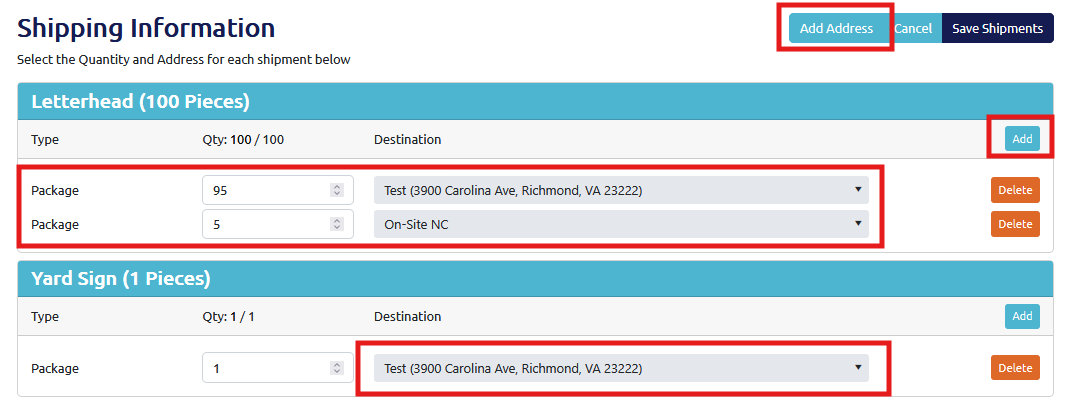
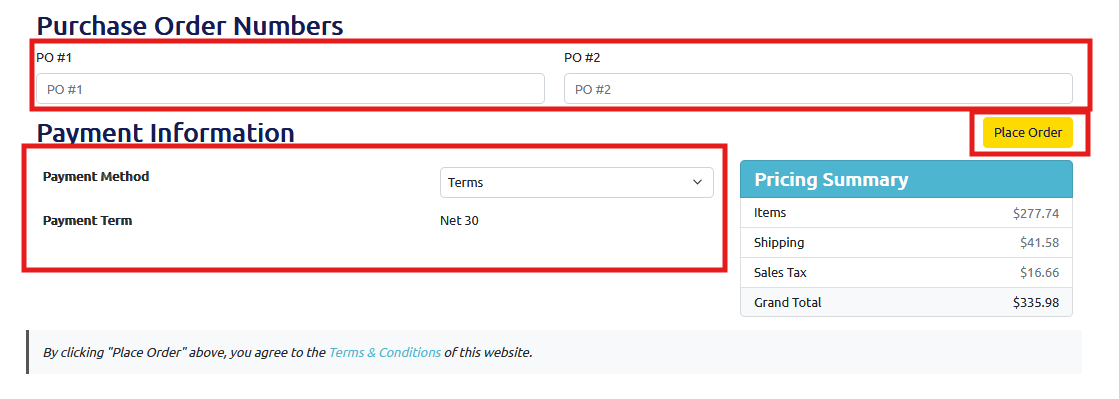
Placing Your Order
Mailing and Postal
Starting Monday, November 23rd, 2008, the USPS mandated that all discounted mail (any mail that isn’t first class stamp, or metered with full price postage) comply with the National Change of Address (NCOA) requirements. Each year, millions of individuals and businesses move or relocate. Mailing lists that are not updated with change of address information may contain invalid addresses in excess of 15% or greater.
The bottom line is that the USPS is cracking down on undeliverable mail. In order to comply with the new NCOA postal regulations, all mailing lists that are supplied to Conquest Graphics by our customers must be processed against the updated USPS change of address database. Customers who use our mailing services will have two choices:
- Customers who supply mailing lists that are already updated must supply a completed USPS Form 6014, which certifies that the list has been updated. A copy of your completed Form 6014 will be submitted to the local Post Office along with the other required postal paperwork when we drop your mail.
- Customers who supply mailing lists that are not updated against the USPS NCOA database will need to have their lists processed. We will provide NCOA list processing as a fee-based service. Please note that we can also add the field "Or Current Resident" at no additional charge. Please call 1-800-707-9903, or contact us at customerservice@conquestgraphics.com for NCOA pricing information for your project.
NCOA processed lists are valid for 95 days. Any lists that have not been validated in 95 days will require re-processing. Again, this is a USPS rule, and is not specific to Conquest Graphics. We strongly suggest that customers contact us with their NCOA questions.
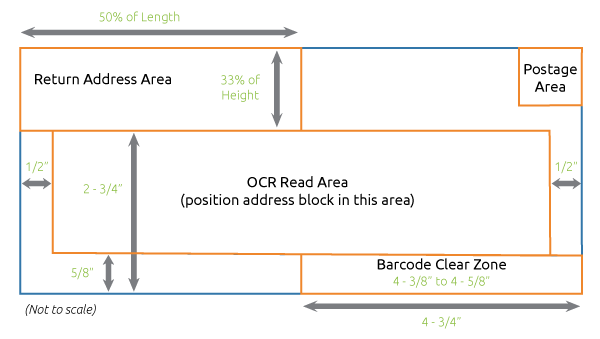
Your mailing pieces need certain clear spaces to allow for bar coding, addressing, and permit information. This helps ensure that the mailing piece meets regulations for your selected mail service and that important information isn't covered up in the addressing process. Read more about mail design standards.
We use coatings and ink-jetting equipment that enable address information to be printed on your pieces without any problems. If you are going to have us aqueous coat your pieces, and then ship them to another location to be mailed, we will include information about the correct inks to use so that the mailing pieces can be addressed correctly. However, we cannot guarantee that another mailing service will be able to successfully address your aqueous coated pieces, even when we recommend the inks which we think will work best.
If your piece requires UV (ultra-violet) coating, we cannot inkjet on the UV coating. You must either UV coat on the front side (non-addressed side) only, or your piece must be printed and addressed using an all-digital printing workflow which we do provide.
Additional Tips:
- The mailing panel needs to be a blank white box with a minimum size of 4 x 2.25"
- The mailing indicia and any endorsements must be properly worded
- For Non-Profit mail, the mailing panel of your piece must have both the name and address that exactly match the address on the paperwork issued from USPS for your original non-profit postal permit. It doesn't have to be in the return address area, but must be somewhere on the mailing panel of the piece.
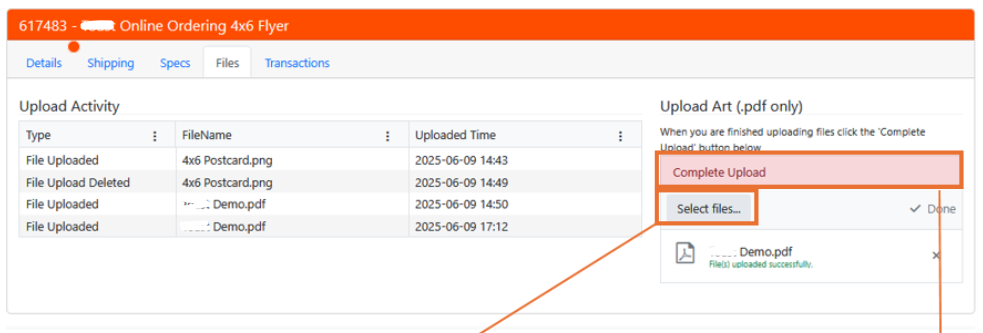
Preparing Artwork and Files for Upload
We accept the following file formats for mailing lists:
- Comma Separated Values (.csv)
- Delimited Text File (.txt)
- Microsoft Access (.mdb)
- Microsoft Excel (.xls)
Microsoft Excel is our preferred file format. If you don’t know what you have, or you need help, call 1-800-707-9903, or contact us at customerservice@conquestgraphics.com.